CONN BURANICZ
GRAPHICS TECH ARTIST
PERFORMANCE - SHADERS - CODING - PROCEDURAL TOOLS

Demonstrating my RayTracer rendering OBJ files as the final triumph

Demonstrating my RayTracer rendering OBJ files as the final triumph

Demonstrating my RayTracer rendering OBJ files as the final triumph
Demonstrating my RayTracer rendering OBJ files as the final triumph
THE BOOKSTORE
In the summer, we took a trip to Portand, Oregon for the first time. We visited Powell's Books (the world's largest independent bookstore). Well, it certainly was huge, I mean, it takes up a city block! In their massive Computer/Technology section, I spotted a book called "The Ray Tracer Challenge" by Jamis Buck. I should of bought it there and then...but I second guessed myself. Yet the idea of following the book step-by-step really compelled me, and soon after returning, I purchased the book online. And now, this Post is showing the results! Following a book through to the end isn't special, but writing a Ray Tracer was on my bucket list, I'm quite proud of it. Along the way, I did make my own additions here and there. I whole-heatedly recommend "The Ray Tracer Challenge." It's very easy to follow, pictures abound, and has some great online appendices.

Here's a snapshot I took of the storefront, and me holding "The Ray Tracer Challenge" while I was there
GETTING STARTED
The Ray Tracer Challenge is language agnostic, with psuedocode examples throughout. I chose to write the project in C++ because that's my wheelhouse, but also a compiled language will certainly run faster than a scripting language. I used SDL2 for keyboard input and real-time previewing. For each chapter of the book, Jamis Buck wants the readers to implement Validation Tests to verify that the math functions have been implemented correctly. As you implement more features these Tests should be run through everytime to make sure the RayTracer is still working correctly. The author has written out the Validation Tests in Gherkin to be used with Cucumber. However, I simply defined each Test as it's own boolean function.
Each chapter of the book builds upon the last, with concrete goals that gradually lead up to a RenderMan quality Ray Tracer. Starting things easy, the book asks readers to implement their own Point and Vector classes, followed by writing out to PPM files to view the results. The first thing the book asks you to draw are 2D parabolas...not quite ray-tracing yet!

The first few chapters are about building a Math Library, outputting to canvas etc. The "clock" image on the right is to prove 2D Matrix Rotations work
Finally at Chapter 5 officially kicks off ray-tracing, starting with a flat-shaded sphere. The book has such nice illustrations to demonstrate ray-surface intersections, N * L, and other 3D Graphics concepts. While I was already familiar with a vast majority of these, I'd imagine this book would be fantastic for a relative-newcomer to these ideas! Afterwards came shading spheres, followed by a basic scene of spheres and infinite planes. Little by little the project fleshes out!

OF SHADOWS AND ACNE
Going through the Chapters, the features pile on. More shapes, introducing patterns (stripes, checkers, etc), shadows, and of course reflections...the REAL power of the Ray-Tracer! With Shadows, the book expects you to first run into the dreaded "Shadow Acne" problem (the result of floating point precision issues). Afterwards, the book suggest you add an epsilon offset along the Normal to correct for the Shadow Acne problem.
Shadow Acne was solved in Chapter 8, but later on, I ran into more "Acne" issues. When I implemented the Torus Shape (more on that later) my Torus renders had hairline artifacts. I never figured out what the precise issue was. I caved, and brute-forced a solution by switched my codebase from single-precision Floats to Doubles. With greater precision, I never ran into "Acne" again.

Acne caused by floating point issues. When the Ray intersects the Shape Surface, the rounding errors cause points of intersection to lie beneath the surface, causing the shape to cast a shadow on its own point of intersection!

The most common solution for Shadow Acne (and Z-fighting) is to push the point just slightly along the Normal to never allow this self shadowing error to happen
Once I switched the Raycasts from using Floats to Doubles, these precision errors went away
Acne caused by floating point issues. When the Ray intersects the Shape Surface, the rounding errors cause points of intersection to lie beneath the surface, causing the shape to cast a shadow on its own point of intersection!
ALL ABOUT MIRRORS
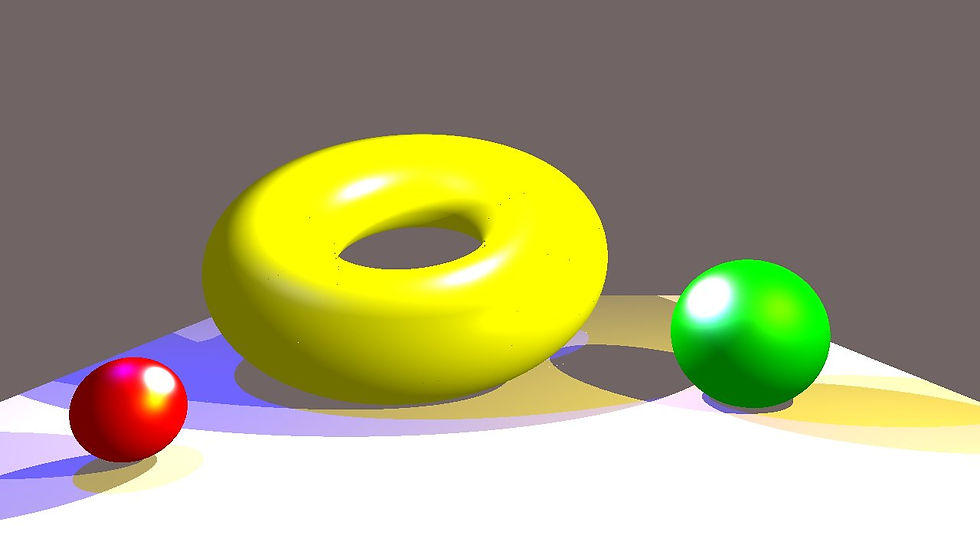
Chapter 11 finally got into Reflections, and surprisingly, after setting all the groundwork from the previous chapters...they were relatively easy to implement: all the ingredients were already in place. Man, this book does a great job building you up. If the Ray hits a Shape whose material's reflectance value is greater than 0, a new Ray will be fired until a non-reflective Shape is Hit (or there's a Miss). Reluctance drastically increases Render Times because you're exponentially firing more Rays now. For the sake of performance (and avoiding infinite recursions) we limit the number of times a Ray can bounce. Typically I leave it at Max two Bounces (just like Portal (2007) on Xbox 360!) Man, my RayTracer was now starting to look GORGEOUS:: reflections really are the secret sauce!

2160p Render of Mirrored Torus scene, downsampled to 1080p. This might be my favorite render!
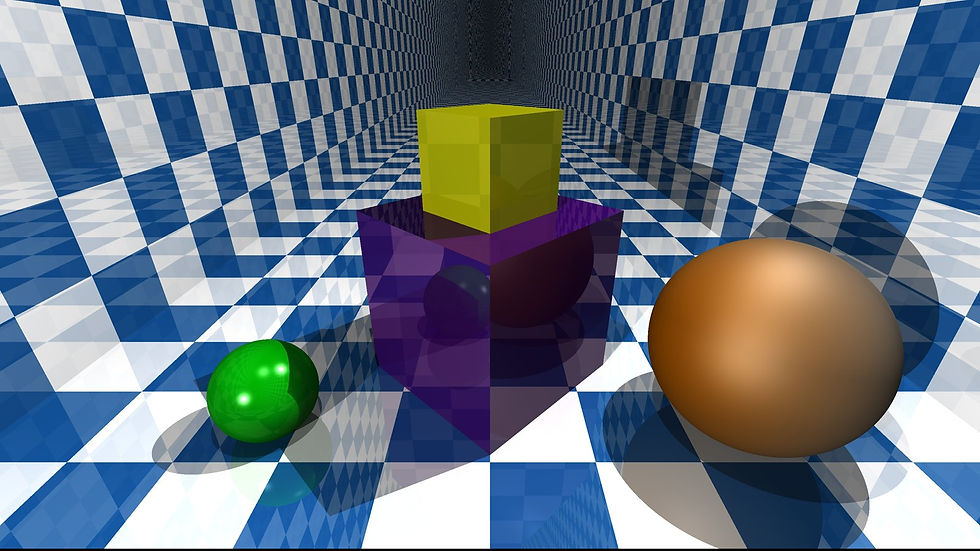
For some reason, the book doesn't ask the reader to implement Boxes until Chapter 12!
2160p Render of Mirrored Torus scene, downsampled to 1080p. This might be my favorite render!
Refraction was more difficult. Now, I had to worry about Rays traveling THROUGH the Shapes. My renders kept failing, my Sphere was coming out all Black and for longest time, I couldn't figure out why. After debugging for hours, including making my own Sanity Tests, I discovered a simple mistake: I wasn't inverting the Hit Normals if inside the Shape. This wasn't a problem earlier because, with Reflection, the Rays would always bounce away from the surface. My mistake meant that the Rays where never making it to the other side: a total internal reflection always occured, returning black.
Man Refraction, especially in motion was looking good! I added a rudimentary Batch Process system to my Ray Tracer so that it would output N Frames, modifying specified values (Offsetting Translation etc) at each Frame. This Batch Process allowed me to create "Animation" like the GIF you see below

This Animated Gif shows my RayTracer with refraction. Crazy how a few primitives can compose a compelling scene!
MULTI-THREADING
Once Reflections were applied to surfaces (especially to the background) Render Time skyrocketed! To start, I added a Timer and Percentage Tracker to the Window of my Ray Tracer to keep track of the time (and number of Intersection Tests) it takes to render the scene. The book doesn't cover at all Previewing. The start of the book asks you to implement writing to 'ppm' file format, and I guess you're expected to just till the render finishes every time. No way man! So early on, I implement real-time previewing using SDL2. The Render Buffer would copy to the Canvas after every 1% progress. Rays would literally fire from left-to-right, bottom-to-top. It was very exciting seeing the real-time rendering though!
A little later on, I implemented multi-threading using the C++ Standard Library Thread class. Rather than calculate each pixel sequentially, the Canvas would be divided into NxN Sectors, each a fixed size depending on the Output Resolution. For example, a 1920x1080 Output would be partitioned into 320 Sectors at 120x54 pixels each. The beauty of a Ray Tracer is that it's for Multi-Threading, its completely thread safe. Pixels being rendered have no dependency on each other. The Preview Canvas is only updated by the Main Thread.
Based on how many Cores the CPU had, N number of Parallel Processes would kick off, each grabbing a random Sector from the List. Its randomized so you can see multiple portions of the Canvas draw in parallel. Once a Sector was fully drawn, the Thread would grab the next Sector until the List was empty. Once all threads joined back, the main thread would write out the result to the output file. viola! Multi-threading DRAMATICALLY improved rendering times because multiple pixels were being rendered at the same time. Efficiency x16 using my i9-12900K!
#include "Rendering.h"
#include <thread>
// Determined number of CPU Cores,
// calling function based on 1, 4, 8, or 16
// Assign this the main thread
mainID = std::this_thread::get_id();
std::thread first = std::thread(&Rendering::AssignRenderTask, this, world, canvas, camera);
std::thread second = std::thread(&Rendering::AssignRenderTask, this, world, canvas, camera);
std::thread third = std::thread(&Rendering::AssignRenderTask, this, world, canvas, camera);
std::thread fourth = std::thread(&Rendering::AssignRenderTask, this, world, canvas, camera);
// Put Main Thread to sleep while other threads kick off
std::this_thread::sleep_for( std::chrono::milliseconds(200) );
AssignRenderTask(world, canvas, camera);
// Pause until threads finish
first.join();
second.join();
third.join();
fourth.join();
// Apply Final Preview, inform Finished
canvas->UpdateProgress(100.0f, world->GetIntersectionTestCount());
canvas->Preview();

The Canvas is divided into Sectors, and each Thread randomly pulls another Sector to render from the Stack when Idle until all Sectors have been rendered! 13 Seconds rather than over a Minute!
GROUPING
Chapter 14 asked readers to implement Hierarchical Groups. They made controlling a Scene MUCH easier because now rather than modifying the Transform of every Instance individually, they can be done together! Anything can be nested into the Group: Shapes, Lights, the Camera etc. The book didn't use the terminology, but the world could now be represented via a a Scene Graph Management System, including Tree-Based Representation.
Groups can easily be parlayed into Bounding Boxes, dramatically reducing the number of Intersection Tests for Scenes with many objects. Why bother iterating through all Shapes in the Scene if a Ray won't come remotely close to hitting most of them? Rays now only need to test against a smaller number of Bounding Boxes. If a successful Hit, then Intersection Tests are fired for Shapes grouped within. Please take a look at the Chart below to see how partitioning the 64 Spheres into Nested Bounding Boxes has drastically reduced Intersection Test count, thus reduced Render Times!

This Chart demonstrates how using Bounding Boxes reduces the number of Intersection Tests needed and can significantly speed up Render Times!
TRIANGLES MAN
The book saved Triangles for last. Why? Well, with Triangles we get Meshes and...OBJ files! At the start of Chapter 15, the author asked readers to draw a simple Triangle, followed by six to make a pyramid. Immediately after, we're asked to implement reading in Wavefront OBJ file format. The Utah Teapot makes an appearance! First, we draw Hard-Surface Normals, followed by Smooth Triangles. With this in place, I could render anything I want now! The book originally didn't cover Texture Mapping, but the Bonus Chapters online filled in those details! And so, I had a ton of fun rendering out videogame characters I found on the Modeler's Resource website. Compared to the Primitive Shapes, Triangle Meshes take substantially longer to compute. Even a simple 12 Triangle Box takes longer than rendering the primitives. Makes sense,

Ryu from Marvel vs Capcom 3
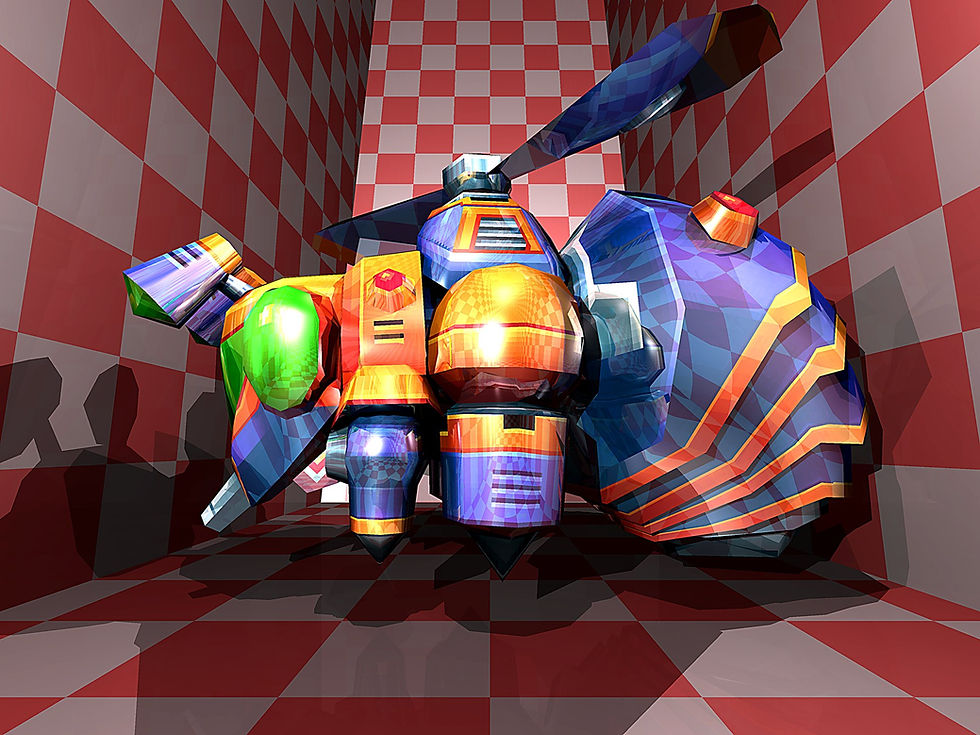
Bee Blader from Intro Stage of Maverick Hunter X

Millennium Era Mecha Godzilla from the PS3 game
Ryu from Marvel vs Capcom 3
BEYOND THE BOOK
So, as the project went along, I was tempted to make tangents because I was so excited about the possibilities. As I already discussed I added the ability to render a Torus. Compared to other primitives Torus' are complicated because a Ray can intersect the surface up to four times! I also implemented Multi-Threading, limited animation playblasting, and other QoL features. The final chapter of the book encourages the Readers to keep going and implement features such as: Motion -Blur, Anti-Aliasing, Texture Maps, and Normal Perturbation. In fact, online you can find Bonus Chapters, and that's how I got Texture Mapping to the models you see above. If I ever revisit this project, I definitely want to add real-time Previewing, where Users can control the Camera, and simplified Ray-Tracing allows you to preview the world (at a decent frame-rate).
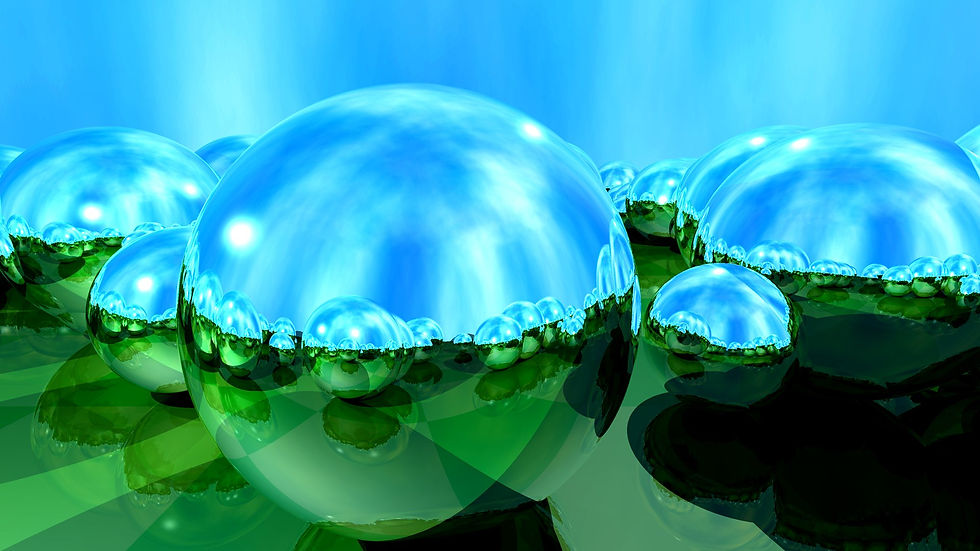
So lastly, let's talk a tiny bit about these Marbles! These Four Rendered Scenes below were actually chosen from several dozen procedurally-generated layouts! I updated my playblasting functionality to do this. I specified that I want 64 Layouts, using 250 Marbles, randomly transformed within a Threshold. The Output was low-res at 320x240, so the rendering finished for all 64 in about 30 minutes. About one-third of the renders were unusable, sometimes full-black because a Marble was randomly placed right on top of the camera! After choosing four layouts that were aesthetically pleasing, I rendered out the images at 3840x2160. Also, because these Marbles are 100% reflective, I added "Mega Quality" Reflections which allowed up to five bounces (dramatically increasing render times) Each of the four images took ~40 minutes to render. I'm quite happy with the Marbles as the coup de grace. Thank you so much for reading through this!