

CONN BURANICZ
TECH ARTIST
GRAPHICS - SHADERS - CODING - TOOLS
PART ONE
ACCIDENTALLY IN CHARGE
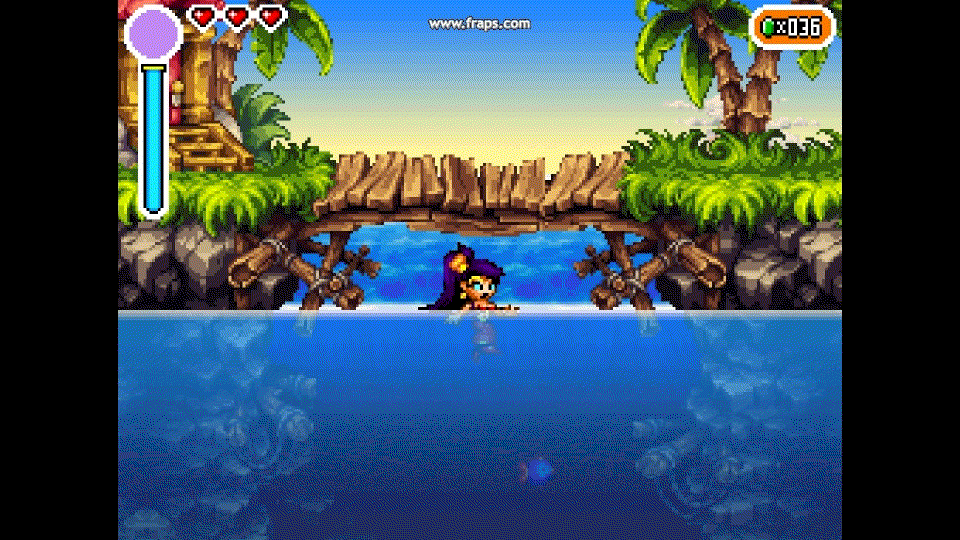
Fresh off developing two LeapTV titles (my first professional projects ever), I was put onto the Kickstarter Shantae team in late 2014. As the Tech Artist for Shantae: Half Genie Hero, I’d been blessed with the responsibilities of performing a variety of tasks for the project; from uv unwrapping to gameplay programming. Arguably, my most visually noticeable contribution has been the water shader. Water plays a key role in both the environment and gameplay of Shantae: Half Genie Hero, with large pools of water present in practically every World in the game. Throughout the game’s water creation, I learned so much about programmable shaders and working directly inside a game engine. I would like to step through the evolution of the water shader and explain a little bit how it works.

In the upcoming sections, I’ll show step-by-step how I created this Water Effect in the WF Engine using HLSL and C++
WF ENGINE
Like many WayForward projects, Shantae: Half Genie Hero runs on the company’s built-from-the-ground-up, 3D engine. Given the limited resources and its infancy, the WayForward Engine does not yet feature a node-based shader tool. So, all shaderwork must be done inside the engine codebase with C++ and HLSL. In the beginning, my shader work was slow; mostly consisting of backwards engineering pre-established shaders in the engine. I had to be really careful when committing my progress because all WayForward Engine projects share graphics and rendering code resources. Accidentally crashing other company projects was an embarrassment I quickly learned to avoid!
HISTORY
My role in creating the water shader for Shantae was almost accidental; a natural progression from one experiment to the next. Before full production began on the project, I was asked to spend a couple weeks acclimating myself to the current state of the tools and assets already built for it during the kickstarter pitch ( many of the tools were also inherited from Duck Tales development ). Among other things, I really wanted to learn how the WayForward Engine’s real-time shader pipeline worked so that, as a Tech Artist, I could help create both materials and visual effects for the project. So, I first began with a simple experiment to create a mirror shader that would project from and render onto a plane during the post process loop.

My first WF Engine Shader; note that the aspect ratio of the mirrored image is squished because its projecting onto a square plane
PLANNING
After successfully creating the mirror shader, I was much more comfortable with the inter-workings of the WF Engine. I wanted to create a shader that would actually be used in-game though. To be clear, I wasn’t asked to work on the water shader, but because I knew water would be used in most of the game, I strongly pushed for working on the tech. While at first simply recognized as an experiment, the water shader became more and more promising, and thus the team gradually came to see it more as one of my official tasks.
Throughout the entire water shader development, I consulted daily with the programmers and directors on the technical limitations and design aspects/needs of the water in-game. Starting simple, my first goal was to create the shader for underwater visuals. I spent a lot of time researching water visuals and rendering in other video games, and in real life. Luckily, Shantae is a very whimsical and cartoony series, so the water in-game is meant to look very stylized. Given the project’s technical constraints and non-senior experience, it was very fortunate that I did not have to strive for real-world realism!
MEMORY BUDGET
One of my shortcomings was my inexperience in creating tech to work across multiple platforms. At the start of Shantae: Half Genie Hero, we were aiming for launching on Xbox 360, PS3, Xbox One, PS4, Wii U, Steam, and the Vita. The team was essentially limited to the hardware of the weakest skew. Primarily, I focused on creating the water shader tech on the PC. However, we frequently needed to revisit shader features throughout the production to make them compatible with console hardware. I heavily relied on the wisdom of the engine programmers in regards to cross-platform support more than any other portion of the water shader.
POST PROCESS
In Shantae: Risky’s Revenge for the DSi, the sprite-based game’s underwater effect was simply screen tinting and line-by-line sine-wave displacement.
Shantae: Risky’s Revenge line-by-line sine wave water effect. Note that the surface water is static; simple SNES-style visual effects
However, with more powerful hardware and the 2.5D visual of the game, I opted for creating the water shader during the post process render phase. Post Process offers simplicity in the fact that only the buffered screen render texture would have to be manipulated, rather than juggling multiple shaders for 2D assets, 3D static meshes, 3D animated meshes, etc. That said, single-pass post process also offered enough versatility to create all the water visuals we needed for the game. At the beginning, I put a large emphasis on compartmentalizing everything I did with the engine because I did not want to step on anyone’s toes. This was another large reason why I chose to stick with the seemingly simplest approach. As will be discussed later, the post processing render pass was a very mixed blessing.
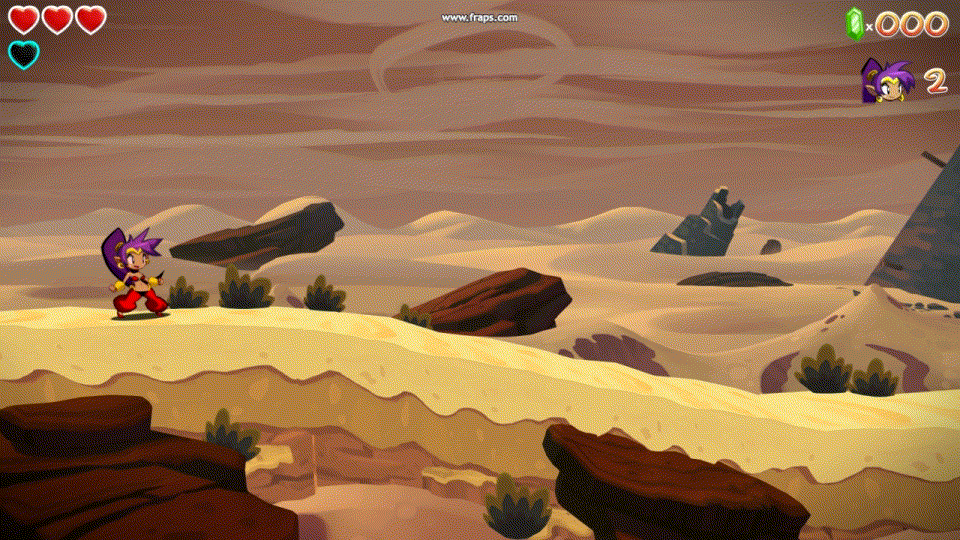
The regular scene; a dry arid desert…not underwater at all!
PART TWO
UNDERWATER VISUALS
As mentioned before, my goals for the water shader kept growing as the results became more promising. But first, it was just supposed to be screen effect for when the player is underwater ( just like in Risky’s Revenge ). The underwater visuals are created during the post-process render pass, utilizing the screen render texture, tinting, and three scrolling texture maps ( normal, specular, and particle ). By combining and manipulating the textures, a highly stylized, but believable underwater effect is created.

In the screenshots below, these three 512×512 textures combine with the screen render to create the post process water visuals. Each can be switched out to make a varying of effects
TINTING
By far the simplest, and cheapest way to make someplace appear underwater is to tint the screen render with an RGB value. There was actually some back and forth between whether or not the water tint RGB vector should be added or multiplied. The debate was which one made the environment and characters look more convincingly underwater. Eventually, it was decided that the surface of the water would be additive, while underwater would be multiplicative.
DISPLACEMENT TEXTURE
Simply tinting the screen to make it look underwater may fly on the Sega Genesis, but the most crucial effect for passing the environment off as underwater is refraction. As mentioned before, running a sine wave through the y coordinates is a very cheap, but convincing technique that’s been very effective even on platforms like the GameBoy. With several additions to the sine wave algorithm, the screen distortion could even become more randomized and realistic looking.
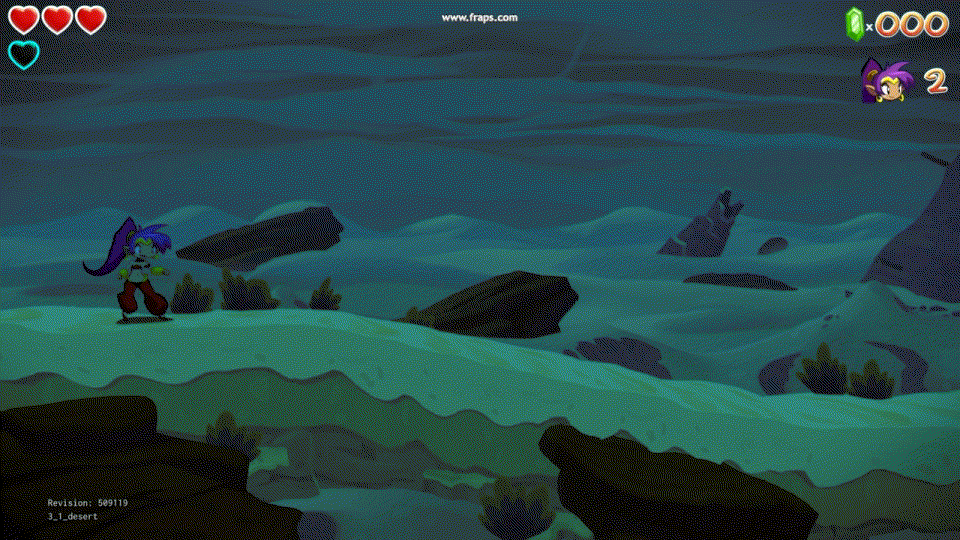
The same desert scene with a teal tint and displacement texture running through during post process
However, I went with a different solution that would more easily put the refraction visual controls in the hands of the environment artists. Instead of using algorithms, displacement maps could give artists control on the underwater refraction. By switching between displacement maps, the screen will refract in a variety of ways. Varying screen displacement visuals help pass off the environment as being submersed in a variety of liquids or materials. The displacement textures is basically a normal map, where the color actually represents direction. In the pixel shader, the displacement map rgb values are converted into the uv coordinates to displace the screen render pixels into non linear paths. Movement is created because the displacement map scrolls vertically, meaning uv coordinates will shift based on the changing rgb values sampled from the looping displacement map. Even at lower resolutions ( 64×64 ), the screen displacement looks convincing enough to be watery waves!
SPECULAR TEXTURE
A major limitation in rendering the water during a single-pass post process was that I was not able to calculate “realistic” water surface specularity based on the normals of rippling waves. Yet like I said before, the goal was not realism, but stylizing the water so that it matches the game’s concept art as close as possible.

The refracting specular splotches is an inexpensive hack to simulate a water surface
In actuality, the specularity of the Shantae: Half Genie Hero water shader is simply a refracting, repeated, scrolling alpha texture. The texture is a series of white splotches that when distorted, look closely like water ripple highlights. All the water shader textures use the uv’s generated from the displacement map, so that they all blend together. That said, the specular texture uv’s are further refracted by multiplying them with a user-driven variable ( usually a fraction between 0 and 1 ). Thus, the specular splotches exponentially displace. The specular visuals seemingly grow and split ( lava lamp-esque ) giving a very cheap and rough simulation of how specular reflections on the ripples of the water would look.
PARTICLE TEXTURE
The particle texture is essentially, the sprinkles on top of a sundae. The texture is supposed to be a patterned, alpha texture that scrolls above the water to give the impression that there is substance and viscosity in the liquid.

the varying particle sizes and transparency help sell the idea that scene is being viewed through several feet of water
The effect only really works if the alpha is set very low, otherwise, it won’t really look like the particles are “mixed in” with the water. Mostly, we’ve used textures of small specks or bubbles, but even larger globs of mud and grit will help sell the idea of murky water or even a jello-like substance! While the displacement and specular textures scroll in the same direction, the particle texture scrolls in a counter direction to help sell the idea that the particles are solidus and floating in the water. Honestly, the water effect could work without this last feature, but it’s useful enough that we could make the water imply different properties ( temperature, matter, etc ) just by changing the particle texture.
Final Result; all three texture effects are combined plus a bloom pass to render an underwater desert!
PART THREE
THE WATER RECT
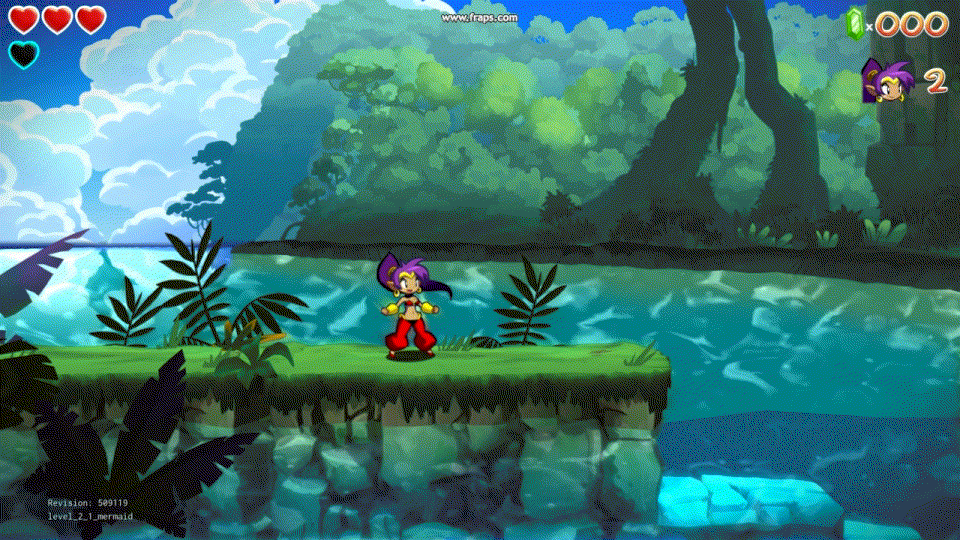
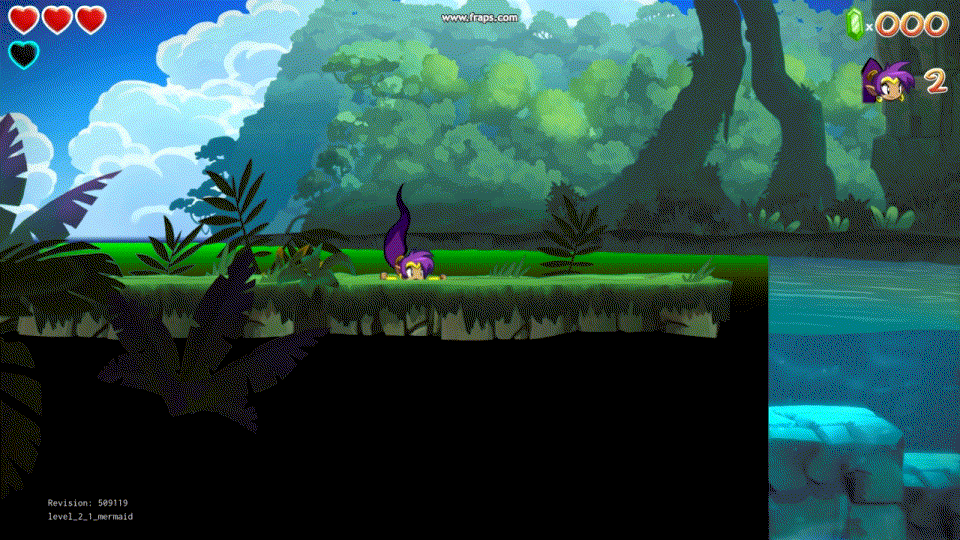
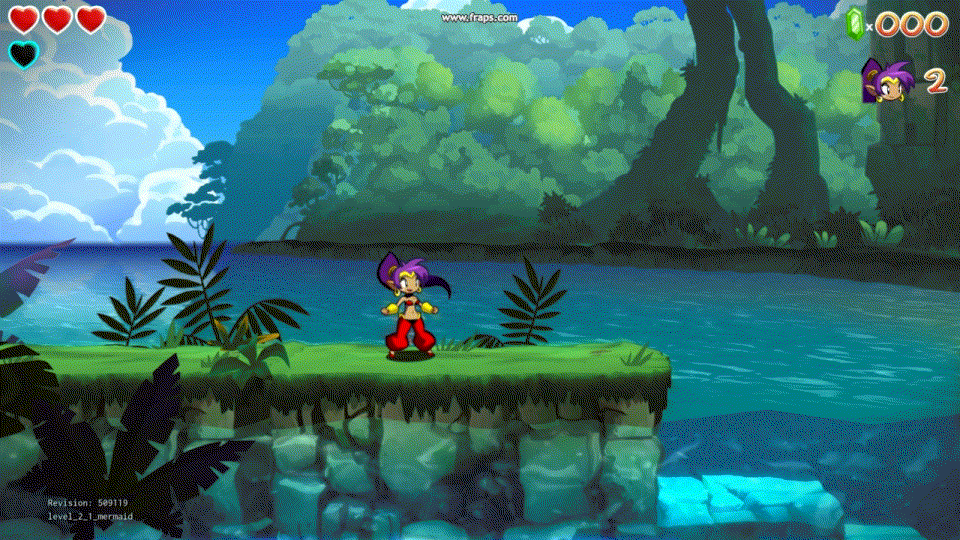
I successfully wrote a filter that would render over the screen to give the impression that the environment was underwater. At this point the water shader was essentially a filter overlayed on top of the screen, and originally that was my end goal. However, the game did not have underwater-only levels, but rather, the levels feature pools of water that the player would submerge in and out of. So, the next step was to create an object that artists or designers could place in the level to dictate where the pools of water were; what part of the screen would be post-processly rendered underwater. Thus the Water Rect was born.

The WaterRect is placed in the Level Editor by either a Designer or Artist. Its position and scale dictate where the water renders on screen and where water gameplay and logic take place
RENDERING MASK
The first challenge was discovering the best way to label what portions of the 3D environment is supposed to be underwater. Easily enough, the Water Rect was a 3D tessellated bounding box that, when placed in the editor, can be scaled as large as needed to be. This box would define how far the water extended to. For gameplay purposes, this worked fine, but the the water shader was post processing, therefore based strictly on 2D screen coordinates. So originally, we decided to create an UnderwaterMaskComponent that would create a rendering mask and store it in the unused screen render texture alpha channel. The one byte underwater mask read water off or on ( 0 to 255 ) with all values between blending the two the original screen pixel and water pixel data together. The typical z-depth buffer rendering would ensure that the water would never render behind or in front of anything that it wasn’t supposed to.
Underwater Mask dictates where the water will be drawn. Shantae and the environment stencil out where the scene shouldn’t render the water
A major problem arose though with transparency. The UnderwaterMaskComponent assigned different alpha values to distinguish between the surface of the water and underwater. This meant that there was not actually a binary gradient between water on or off. Transparent art would not accurately blend with water. Our original solution was to ignore transparency, but this resulted unacceptable visual issues with the in-game VFX, and put a border outline around all the 2D characters. We eventually took advantage of both the alpha channel and stencil buffer, and the underwater rendering mask was solved.

Blending issue example. Notice how Shantae’s border, partially transparent pixels are blending with the water and ground instead of the smoke and fire vfx
VERTEX-BASED WAVES
Since we wrote the WaterRect to build its own mesh, we also added the user-option to decide how many faces it had; n-columns and n-rows. The mesh only had a front and top side to save on resources, and the other sides were never meant to be seen anyway. With n number of possible vertices, we could create another crucial part of water; waves. The water shader visuals are 100% done in the pixel shader during the post process rendering phase, so the actual water textures would not be able to take advantage of the waves. However, the Water Rect vertices are manipulated in the vertex shader. The vertices are manipulated in a sine-wave pattern, meaning the underwater mask would change frame by frame. Thus, the water shorelines and object partially submerged would make the water waves fully visible.

The WaterRect top and front face are tesselated to create waves via the vertex shader, the more rows and columns input by the user, the smoother the waves look
PART FOUR
SURFACE WATER VISUALS
By the time the WaterRect was finished, it was clear that the water shader was being used to represent water in 3D world space rather than a simple 2D overlay. The problem was that since the water shader was post process, there was no concept of z-depth or anything other than 2D screen space. Therefore, the perspective would have to be faked within the pixel shader.
This is what the water looks like without surface perspective…
As mentioned before, we wrote threshold values in the underwater mask to pass through which portions of the screen represented the surface of the water vs underwater ( drawn without perspective ). Unfortunately, this wasn’t enough information to draw correct perspective. So, through the registers, we passed in the WaterRect z-depth bounds and camera position. This gave us enough variables to work with. Only horizon perspective is being calculated, the surface of the water does not account for shorelines or any direction other than straight-ahead. That said, I don’t think the lack of these traits break the illusion of the water. In fact, the underwater masking and vertex-based waves probably do most of the work in terms of, for example, making a pole in the water appear convincingly to be surround by liquid all around.
HORIZON PERSPECTIVE
The surface water visuals are simply about skewing the uvs of the textures to create the illusion that the water is getting farther and farther away. The perspective is happening entirely in xy screen space. First, rangeY is calculated based on passed in values of the WaterRect z-depth. The farther back the water reaches, the more its maximum skew will need to be to accurately create the water perspective. With rangeY found, the surface water onscreen must be converted to a 0-1 gradient so that skew will gradually go from min to max.
The gradient represents how skewed the textures get as it becomes greener. Notice how the horizon line stays in place, and the water surface changes perspective even its drawn in 2D space
The water line ( where the surface meets underwater ) is the base and the horizon line is the end. I tried a multitude of algorithms for getting the water’s perspective to look correct. While not visually perfect and computationally fairly expensive for a shader, running the rangeY through the log function gave out the best result.
CAMERA TEXTURE OFFSET
Apart from needing to+ simulate the perspective in the shader, all textures need to be offset based on the camera position as well. Otherwise, the water visuals look like they are moving on a conveyor belt. What complicates things is that each of the three water textures have user-driven variables such as amount of repeat and scrolling speed. Furthermore, the texture uv coordinates needs to stay close between -1 to 1, otherwise floating point precision issues on consoles such as the PS3 will emerge as the uv coordinates become larger as they scroll. Lastly, the amount to offset the textures is dependent on the camera distance, field of view etc. With all these variables in play, its been a little more complicated to offset the textures so that screen space movement matches perfectly to the 3D space movement they’re supposed to represent.
Surface Water Perspective achieved completely in post process pass
TINT GRADIENT
While a single tint was fine with underwater visuals, the artists really wanted the surface to have a gradient tint that started as one color and eventually transitioned into the second. Large bodies of water such as lagoons or the endless ocean especially called for this, and it really helped blend the water with the environment and the sky. It also helped the artists match the concept art even closer.
POST BLUR AND BRIGHT PASS
The WayForward Engine already featured many graphical effects such as bloom and Gaussian blurs. That said, I wanted the water shader to include its own standalone bloom effect. Since the shader rendered in a single pass, I wouldn’t be able to get as robust visuals since typical screen blurring requires at least two passes ( one for horizontal, one for vertical ). So, the Bloom was created by passing each pixel through a nested, looping function. First, the pixel rgb value is passed to the Blur function in which it samples ( 13 or 21 ) pixels in one direction.

Single Pass Blur and Bright Pass of Scene. Both effects come together to create underwater bloom
With experimentation, we discovered that diagonally looked the most appealing in a single pass blur. After pixel samples all the colors, it goes through a Bright Pass function which simply subtracts from the rgb value to remove low luminance pixels and then multiplied by a given bloomBoost variable to give a much more extreme contrast. Because of the for loop and nested structure, this is actually a pretty costly feature, and was therefore disabled on most of the consoles. However, it was really fun to experiment with this effect.
PART FIVE
CONCLUSION
Out of all tasks I performed on Shantae, creating the water shader was definitely the most rewarding and educating. By taking risks and initiative, I was able to spearhead a feature that played a large part of the game; both artistically and technically. By far my biggest drawback was my inexperience with graphics and engine programming for a multi-platform release ( Nintendo, Microsoft, and Sony ). I had to constantly go back and forth with the engine team and address many factors that were essentially non-issues on the PC. I learned so much regarding the engine and graphics pipeline; particularly with debugging, rendering order, etc.

Simple texture changes make the water almost look like lava. Actually looks more like red water…but with a few more tweaks and vfx we could actually pull it off!!
The next time I work on water, I would not place all the visual effects in a post-processing shader. At first, there was a huge convenience because it meant the shader only had to worry about manipulating the 2D screen render. However, as the water shader become more ambitious, all the counter-programming needed to simulate 3D space gradually outweighed this convenience. Next time, all the water visuals will be rendered standalone and actually via the mesh. As for distorting the environment, post process could maybe work ( draw order would be the biggest issue ). Otherwise, all 3D and 2D objects would be rendered with water distortions based on if their positions were within the water space.
While not perfect, the water shader was a success because it met all the requirements that the game called for. And just like all game development, most things are faked or hacks anyway because of lack of computational power, time, etc. After tackling this, I’m confident that I can accomplish any visual effect, provided I have time for research and experimentation!